The Marketing assistant explained
The Marketing assistant explained
Most analytics apps hand you a wall of data and let you figure out what to advertise. The Marketing assistant does the opposite: it reads your own sales data and hands you ready-made campaign selections. You pick the goal — the app picks the products.
What you will learn
- Build ready-made campaign selections
- Set up the grouping and marketing filters
- Send your selection to your marketing channels
Walkthrough: the Marketing assistant explained (3:13).
Set the period — every selection is built from it
Start at the top: pick any date range. The assistant then builds every selection from products that were sold, or added, during that period. Below the period sits one switch that controls how strict the lists are: with Match Marketing Dashboard filters on, every count only includes products that also pass your marketing settings — so the number you see is exactly what opens on the Marketing dashboard. Turn it off to include the broader set.
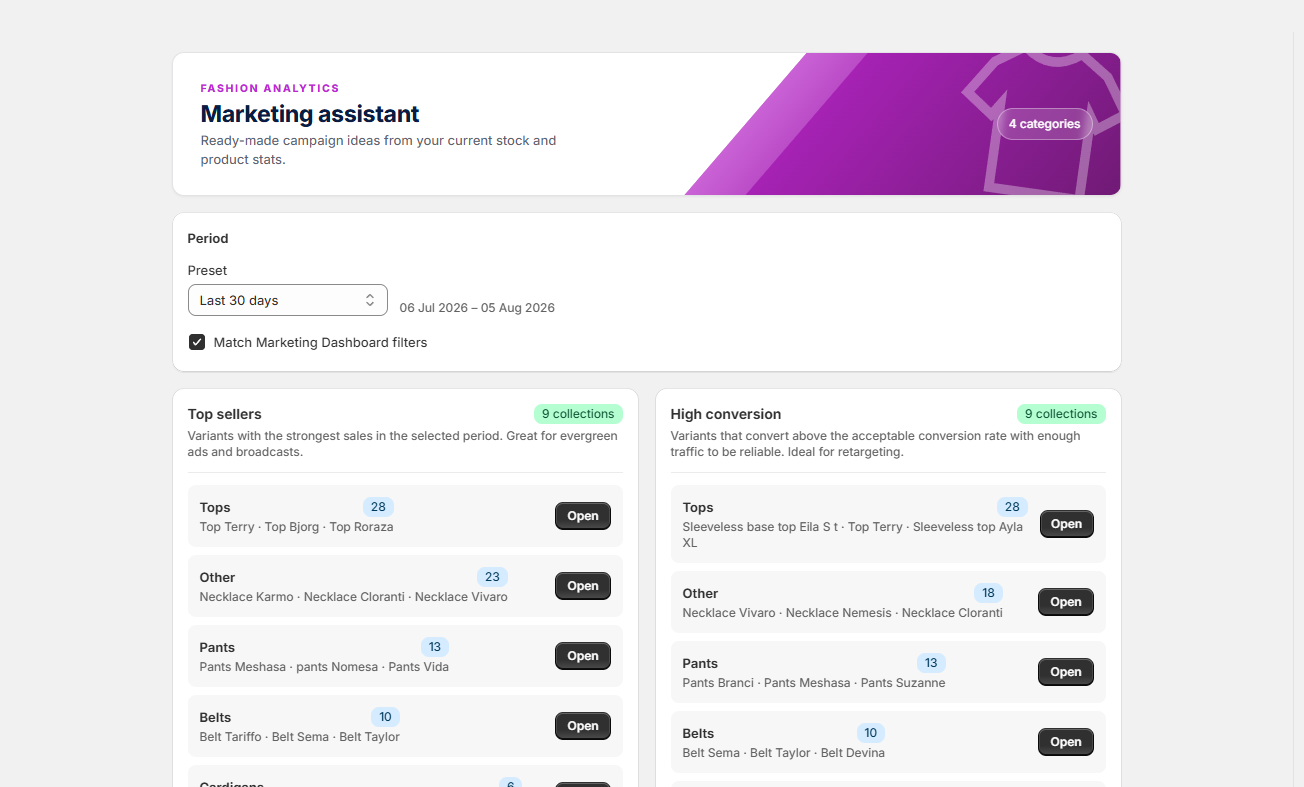
The grouping and filters come from Settings
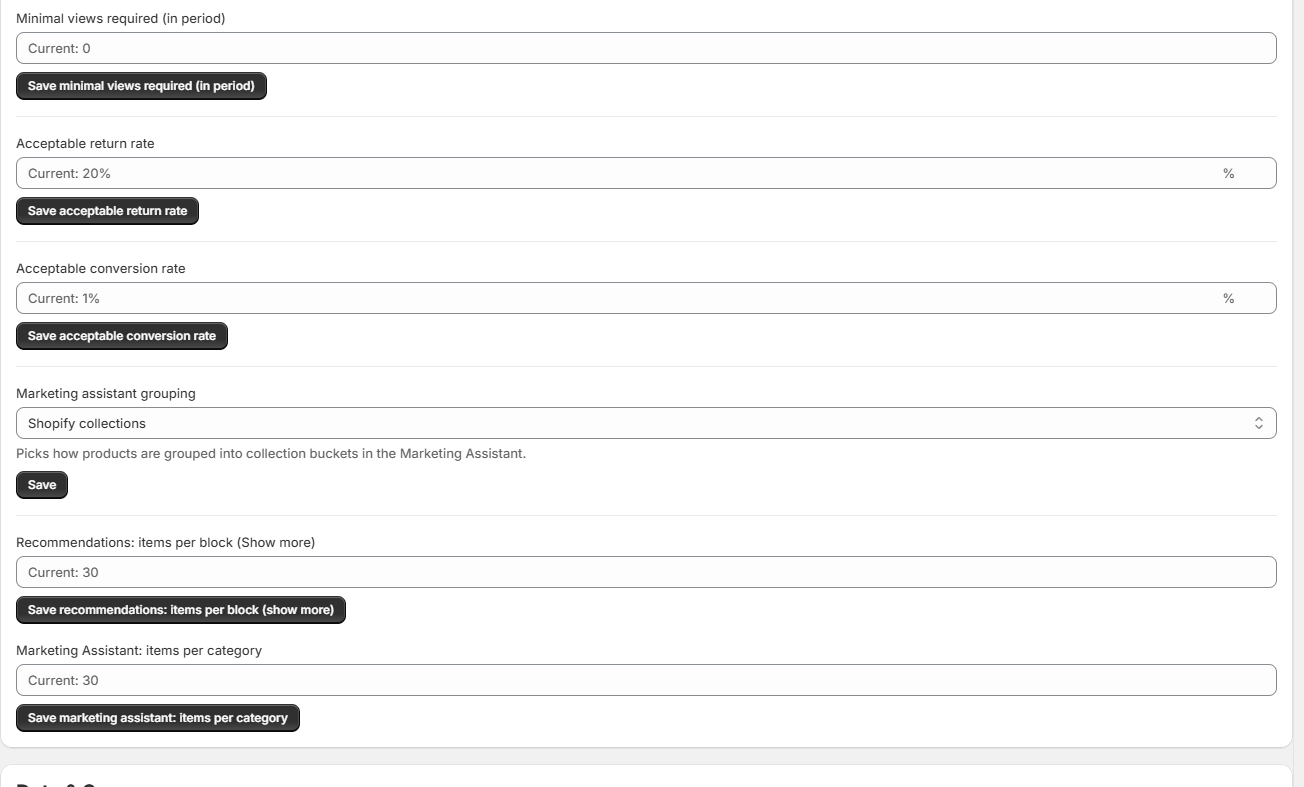
- Marketing assistant grouping — picks how products are grouped into the selection blocks: by Shopify collections, title keywords, Shopify tags, AI-detected categories, or automatic (collections first, then keywords).
- Marketing Assistant: items per category — sets the maximum number of products in each block.
- The marketing thresholds — the assistant also respects minimal stock, minimal sold, minimal views, acceptable return rate and acceptable conversion rate. The Marketing dashboard tutorial explains each of these in detail.
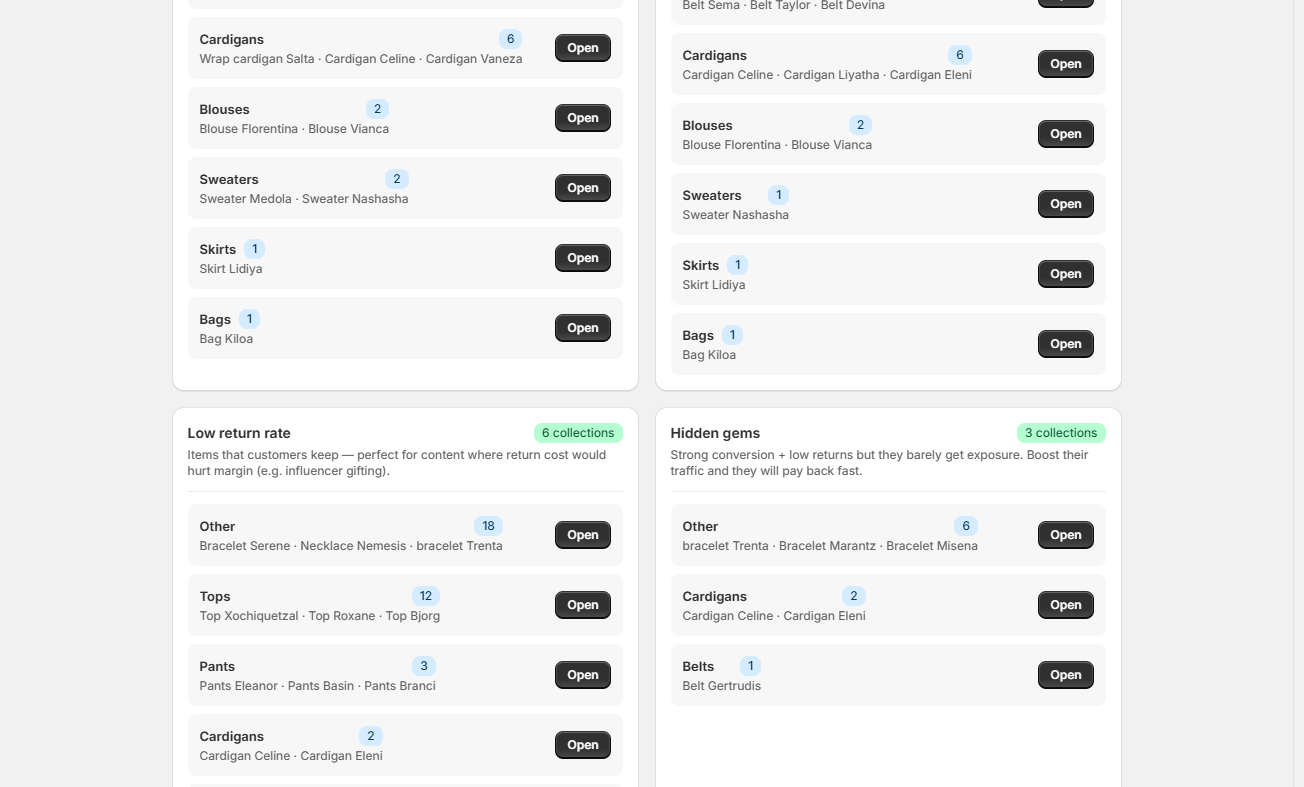
Four categories, four goals
- Top sellers — the products with the strongest sales in the selected period: your proven revenue makers.
- High conversion — products that convert above your acceptable conversion rate, with enough traffic to be reliable.
- Low return rate — the sellers with the lowest return percentage: the items your customers keep.
- Hidden gems — the biggest untapped revenue in your store: strong conversion and healthy stock, but barely any views. Give them traffic and they pay back fast.
None of these selections is tied to one channel — use them for ads, email, your homepage or anywhere else. Each category is split into groups, following the grouping you chose in Settings.
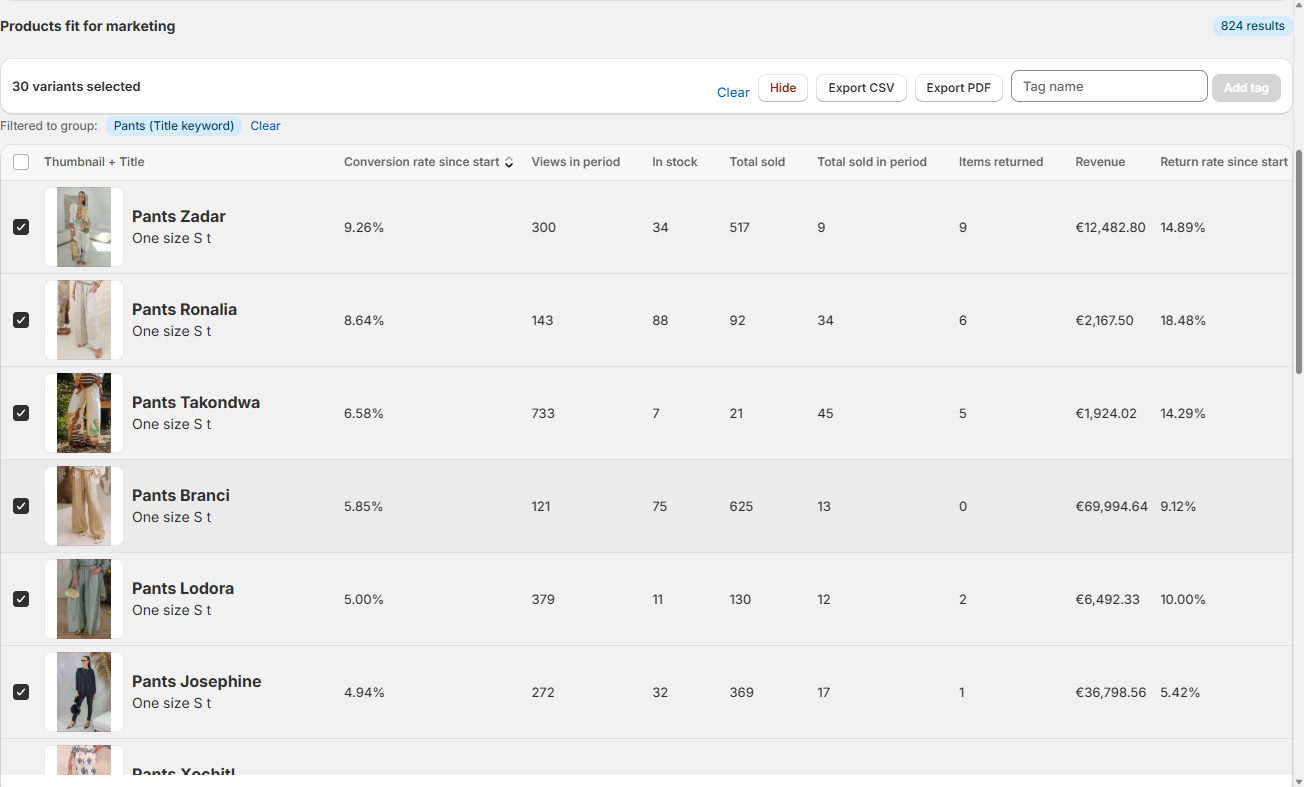
Open a group — the dashboard starts with your selection
When a group fits your goal, click Open. The Marketing dashboard opens with that group pre-selected: the variants are ticked and ready, and a badge shows which group you opened. The selection is not locked — untick a row to drop it, or tick other rows to add products that were not in the group. Then send exactly the list you want: type a tag name and click Add tag (the tag is written to your products in Shopify, so collections, emails and ad tooling can pick it up), or download the selection with Export CSV or Export PDF.
💡 Good to know
- Make it a weekly routine: pick the category that matches this week's goal, open the group, tag it, and build your campaign on the tag.
- Hidden gems is the fastest extra revenue in the app — the products are already proven, only the audience is missing.
- The badge counts follow the Match filters switch: on = exactly what the dashboard will show, off = the broader set.
You never dig for what to advertise.
The campaigns are already built: pick a goal, open the group, and push the selection to your channels with a tag or an export.
Still have questions about the Marketing assistant?
We're happy to help you get more out of it.
✉ Email us support@fashion-analytics.com